Getting Started with Webhooks
7 minute read
This guide takes you through how to:
- Set up a test HTTP POST endpoint
- Register a webhook in Marketplacer Seller and Operator Portals
- Invoke the webhook
If you prefer a video to the written word, then feel free to follow along with this video instead:
Setup a test HTTP POST Endpoint
The webhook events generated by Marketplacer require a HTTP POST endpoint as the target destination. In a production environment, it would be the responsibility of the Information Consumer to provide this endpoint, however for the purposes of this tutorial, we’re going to set up a test endpoint using a, (free), tool called webhook.site
Note
If you already have a HTTP endpoint that can receive POST requests via the internet, then you can choose to skip this section and move on to: Registering a Webhook. This section has only been provided to help you quickly test webhooks and is not intended to represent a production-quality solution.To set up a test https endpoint, simply navigate to webhook.site
You will be automatically provided with unique endpoint that you can use to send webook traffic to:

Important
webhook.site is a 3rd party tool not affiliated with Marketplacer, so traffic sent there from Marketplacer is done so at your own risk.Registering a Webhook
Webhooks can be registered at both the Operator or Seller level, in this guide we show you how to access webhook management from both:
- The Seller Portal
- The Admin (Operator) Portal
Aside from the different entry points, the process for managing webhooks is the same.
Creation via API
Webhooks can also be managed via API, this approach is covered in this guide.Webhooks from the Seller Portal
Login to the relevant Seller Portal
- Select Extensions
- Select Webhooks
- Create new Webhook
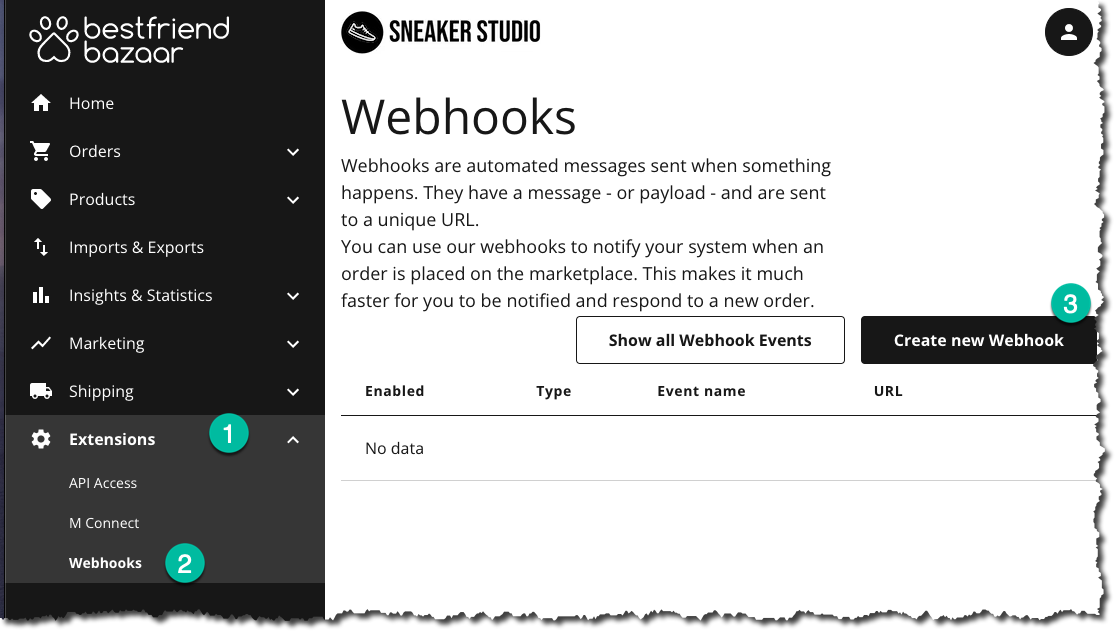
This should then take you to the Create New Webhook Screen:
We’ll pause here, and go through the steps for navigating to the same screen via the Operator Portal.
Webhooks from the Operator Portal
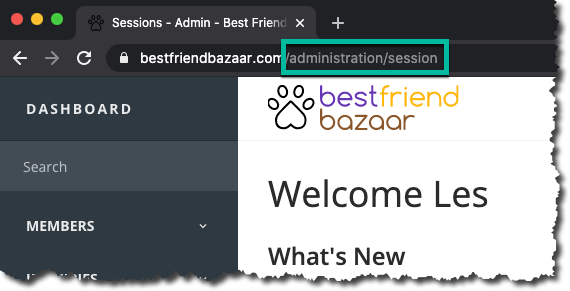
Login to Marketplacer Operator Portal:
In the left hand menu, expand Configuration and select Webhooks:
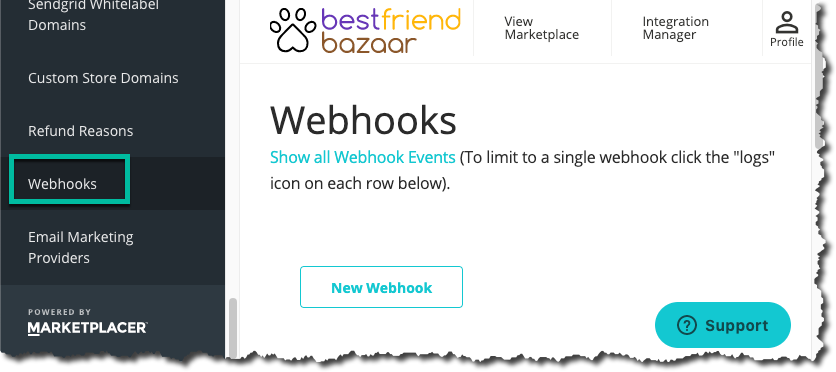
This should then take you to Webhook Management, see below.
Webhook Management
Sellers Vs Operators
For brevity we’ll continue configuring webhooks using the Operator Portal only, but if you are a Seller the steps are identical - the UI just looks a little different, and you have access to fewer webhook object types.Webhook Management is where you would come to:
- Add new webhooks
- Edit existing webhooks
- Look at events generated on existing webhooks
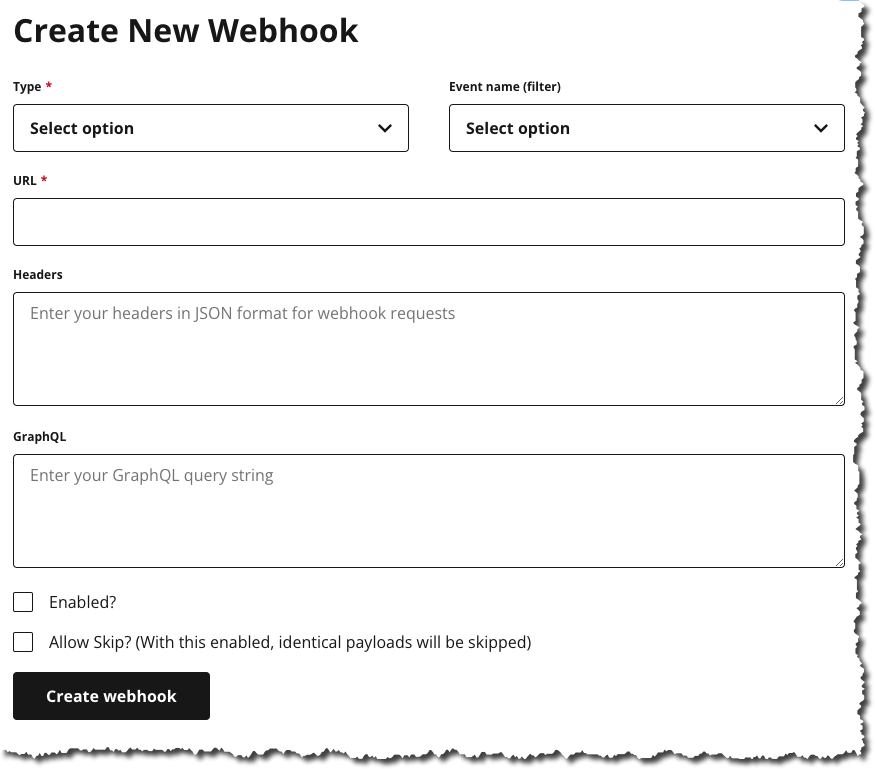
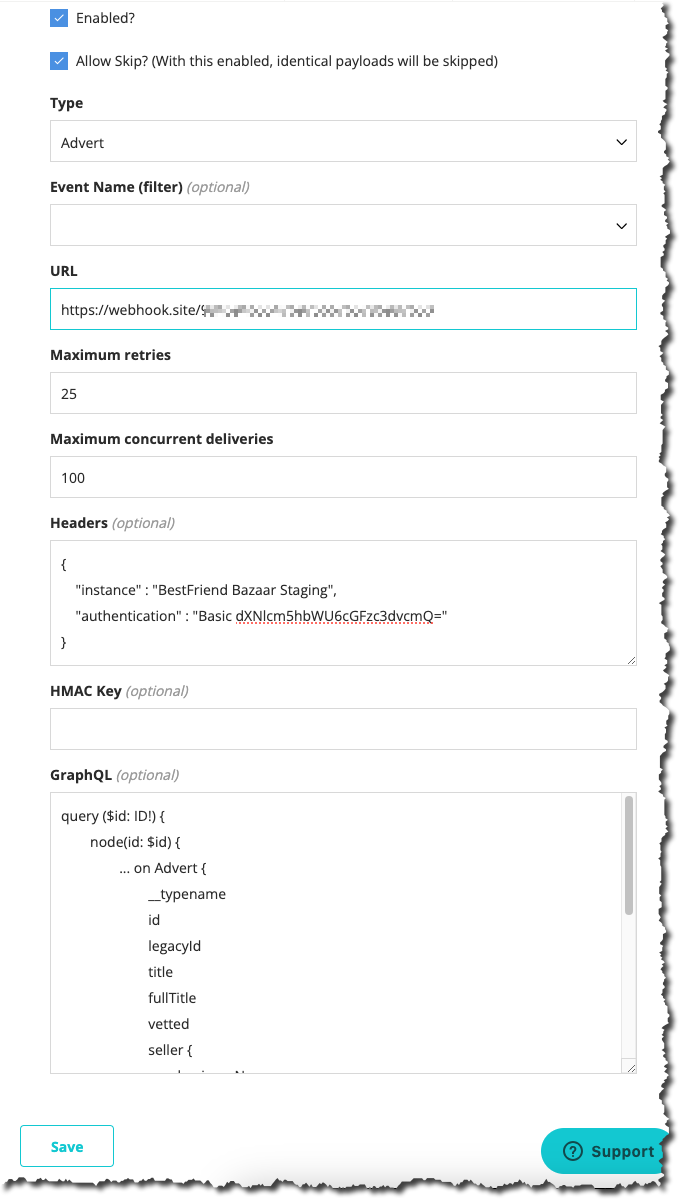
Selecting New Webhook takes you to the webhook creation form as shown below:

These sections are described in more detail below:
Enabled
Self-explanatory really, but remember to tick if you want to generate webhooks - the default is un-ticked…
Allow Skip?
This provides an additional level of webhook deduplication, in that we do not send (skip) webhooks that have identical payloads on the same event type (e.g. update) as the last generated event. You can read more about this feature here.
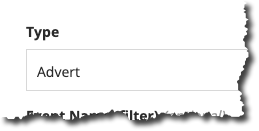
Type
The entities that support webhooks differ depending on whether you are an Operator or a Seller. The table below details the entities that support webhooks for both Operators and Sellers.
| Entity | Operator | Seller |
|---|---|---|
| Advert | Yes | No |
| Category | Yes | No |
| CommissionPackage | Yes | No |
| Invoice | Yes | Yes |
| InvoiceAnnotation | Yes | Yes |
| OptionType | Yes | No |
| OptionValue | Yes | No |
| Promotion | Yes | No |
| RefundRequest | Yes | Yes |
| RefundRequestLineItem | Yes | Yes |
| RemittanceAdvice | Yes | No |
| ReturnShipment | Yes | Yes |
| Seller | Yes | No |
| Shipment | Yes | No |
| ShippingRule | Yes | No |
| Variant | Yes | Yes |
In this example we’ll select the Advert type.
Event Name (filter)
By default you will receive all events for your selected object e.g.:
Create(An Advert/Product is newly created)Update(An Invoice has been updated)Returned(Refund Request has been processed)
Using the Event Name you can filter down to just 1 event type, e.g. create. To do so, simply select the event you want. In this example we’ll leave blank as we want to receive all events
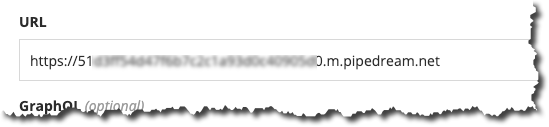
URL
Use the URL of your HTTP POST endpoint, (e.g. this is where you’d use the webhook.site endpoint created in the first section):
Maximum retries
Maximum number of times we will retry sending each event. Acceptable value range: >=0 and <= 50. Default is 25 if this value is not supplied. Note that we will stop after 30 days regardless of the number of retry attempts. You can read more about webhook retires here.
Maximum concurrent deliveries
Maximum number of events we will attempt to deliver for this webhook at a time. Acceptable value range: >=1 and <= 200. Default is 100 if this value is not supplied.
Headers
You can (optionally) add your own headers to the POST request that Marketplacer sends. You do this by specifying a standard JSON object representing the header Key(s) and Value(s) you want to add.
An example where we add 2 headers is shown below:
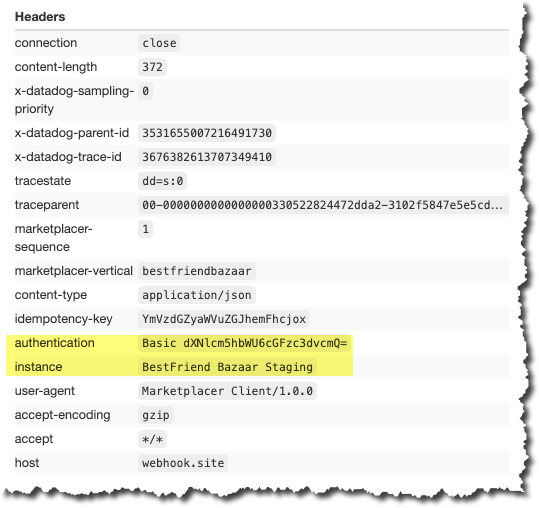
{
    "instance" : "BestFriend Bazaar Staging",
    "authentication" : "Basic dXNlcm5hbWU6cGFzc3dvcmQ="
}
Some additional points to note about headers:
- Marketplacer attaches a number of additional headers to each payload, the ones of note are:
marketplacer-sequence: This is an integer representing the ordinal sequence in which the webhooks were generated by Marketplaceridempotency-key: Used to determine the idempotency of the payload
- Header Keys will be sent in lowercase
- You can overwrite the headers that Marketplacer sends, e.g.
user-agent
A full list of the headers that Marketplacer attach to webhooks can be found here.
HMAC
You can (optionally) supply a HMAC Key to enhance the security of your webhooks - this is covered in detail in this article.
GraphQL
You have 2 options here:
- Leave blank - we’ll send you a basic payload for the entity of your choosing
- You write a GraphQL query - this allows you to tailor the payload returned - we describe this in more detail below
Note
The API collections for both Insomnia and Postman contain a selection of webhook starter templates.Providing a GraphQL Query
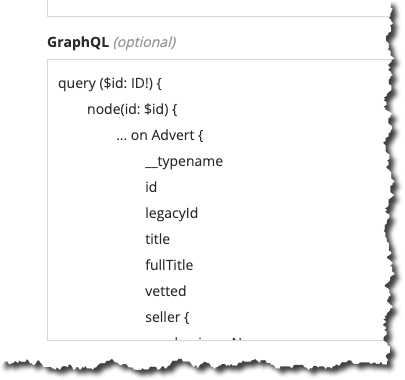
As we have selected advert as our entity for this example, the GraphQL query below shows not only how you can return fields directly on an advert but also for entities related to the advert:
variantseller
It’s also important to note the general structure of all webhook queries:
- The query must accept a variable called
$idof typeID!- The value of
$idis injected by the Marketplacer webhook system every time an event (CREATE,UPDATEetc.) is triggered on that object instance
- The value of
- We then use a
nodequery along wth the$idvariable to query for thatnode - We use an in-line fragment (
... on Advert) to specify the concrete object type we are interested in- In our example this is
Advertbut if you were writing a query for anInvoicewebhook, you’d alter this fragment accordingly
- In our example this is
query ($id: ID!) {
	node(id: $id) {
		... on Advert {
			__typename
			id
			legacyId
			title
			fullTitle
			vetted
			seller {
				businessName
			}
			variants {
				nodes {
					id
					label
					countOnHand
				}
			}
		}
	}
}
Note: A more detailed discussion on querying with GraphQL is outside the scope of this tutorial, for more information on the GraphQL query language, please refer to graphql.org
Adding this query to our webhook registration, you should see something similar to the following:
The Complete Registration
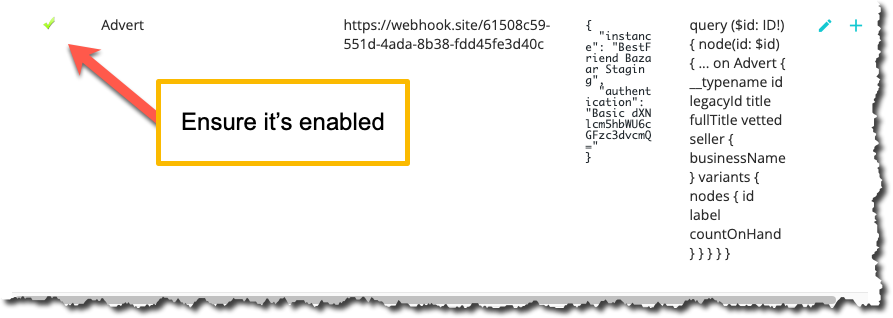
If you have followed the steps above, you should have something similar to this:
Saving the webhook you should be returned to webhook management where you’ll see your registered webhook, be sure to check that it is enabled (the green tick):
Invoking the Webhook
As we have set up a webhook on the Advert object type and elected to receive all events, anytime we Create, Update or Delete an Advert on this instance of Marketplacer, we’ll get a webhook event.
So to trigger an update event, we can login to the Seller Portal and update an existing Advert as follows:
- Expand Products
- Select Manage Products
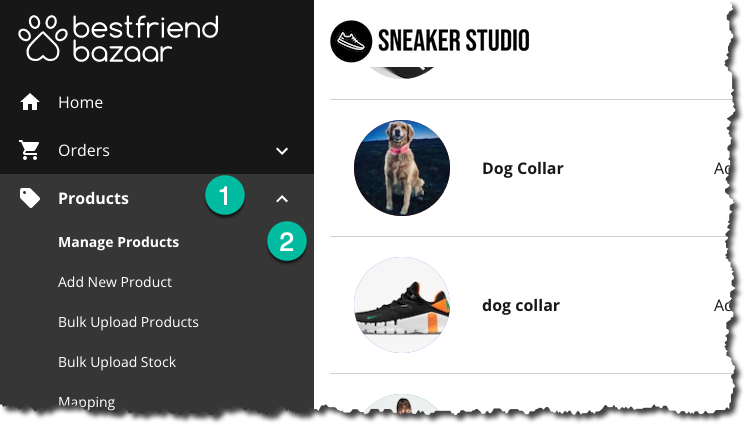
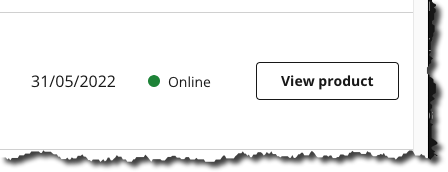
Select “View Product” for the advert you want to edit:
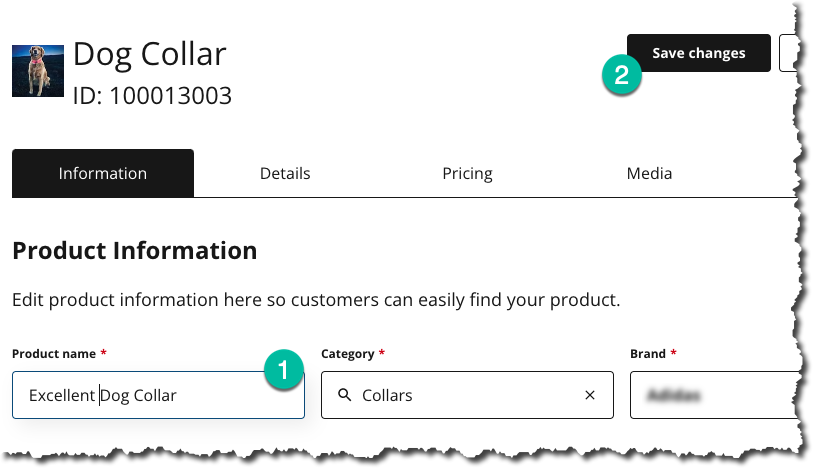
In this example I’ll update the product title, then click save:
This should generate an update webhook event, as shown in webhook.site:
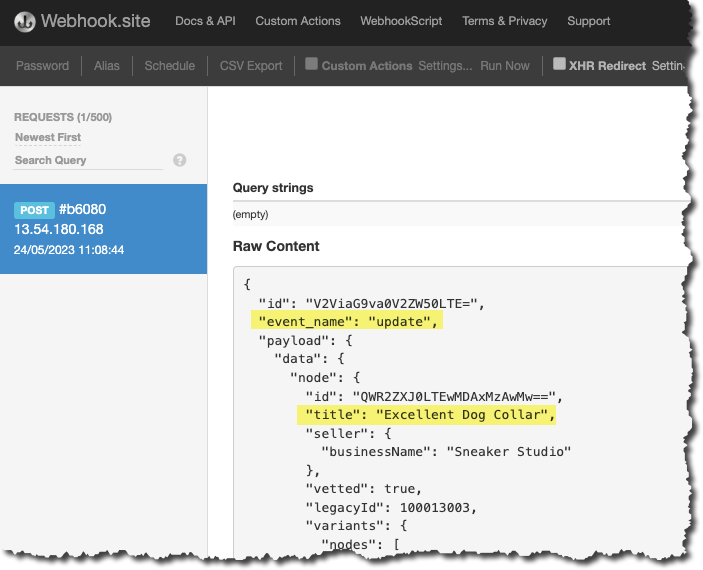
You’ll notice that the webhook payload reflects the GraphQL query we specified, but that we additionally get:
- A webhook
id - A webhook
event_name
Looking at the headers we can see the headers we added, along with the Marketplacer supplied headers:
Webhook Event Retention
Depending on the volume of products, orders and other entities on your Marketplacer instance, the number of generated webhook events can become exceedingly large - therefore webhook events (and responses) older than 3 days will be purged from the platform.