2. HTTP Azure Function
7 minute read
Build Outcome
By the end of this section we will have:
- Created an Azure HTTP Trigger Function
- Tested the function locally to ensure it triggers
- Deployed the function to Azure
Steps
Companion Video
The companion video for this section can be found here.Create an Azure HTTP Trigger Function
Login to the Azure portal and:
1: Select Create a resource

2: Search for “Azure Function” and select the Function App by Microsoft:
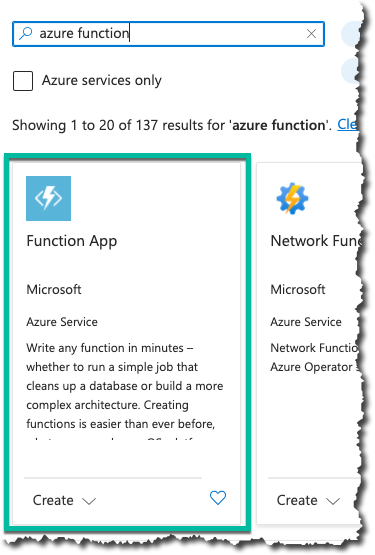
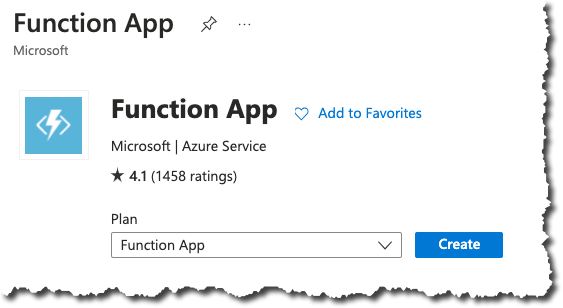
3: Click Create:
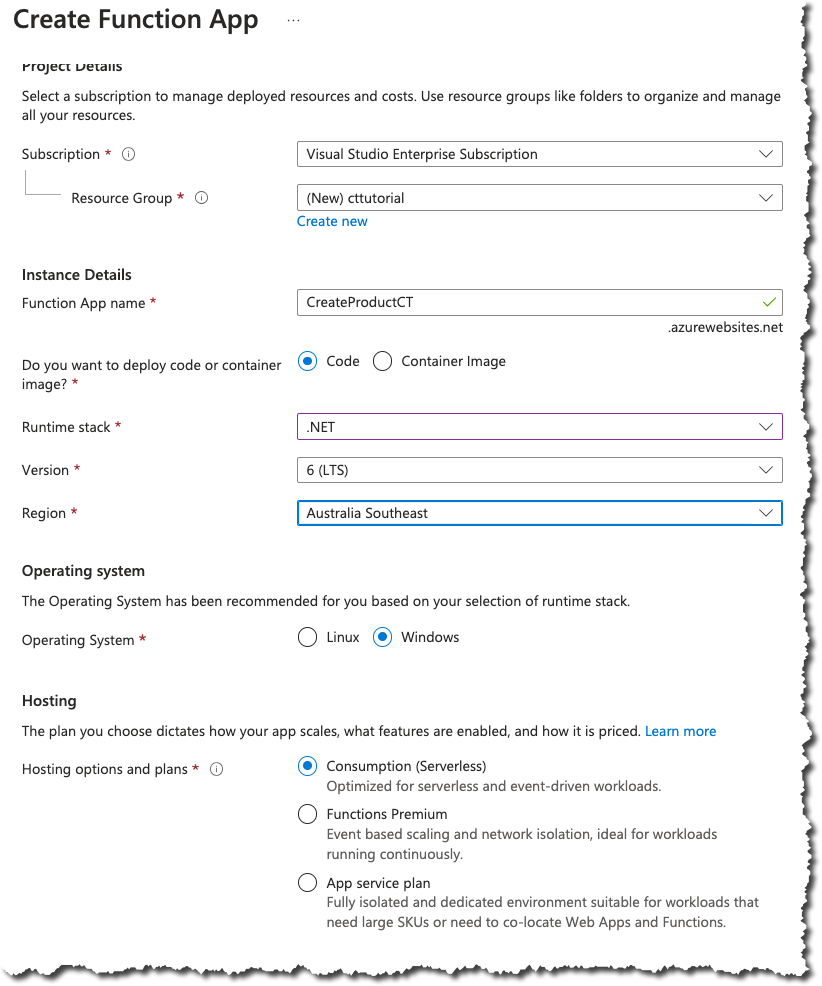
4. Complete the fields in the Create Function App form, ensuring that you select your own suitable values for the following fields:
- Resource Group
- Function App Name
- Region
5: You can choose to move through the rest of the function set up or select Review + create as the default values are sufficient for this tutorial.

6: When you’re happy with the configuration, click create and Azure will start to provision the service.
Warning
You are provisioning a service that may incur charges borne by the Azure account holder. If in doubt, refer to the Azure Pricing Calculator for more info..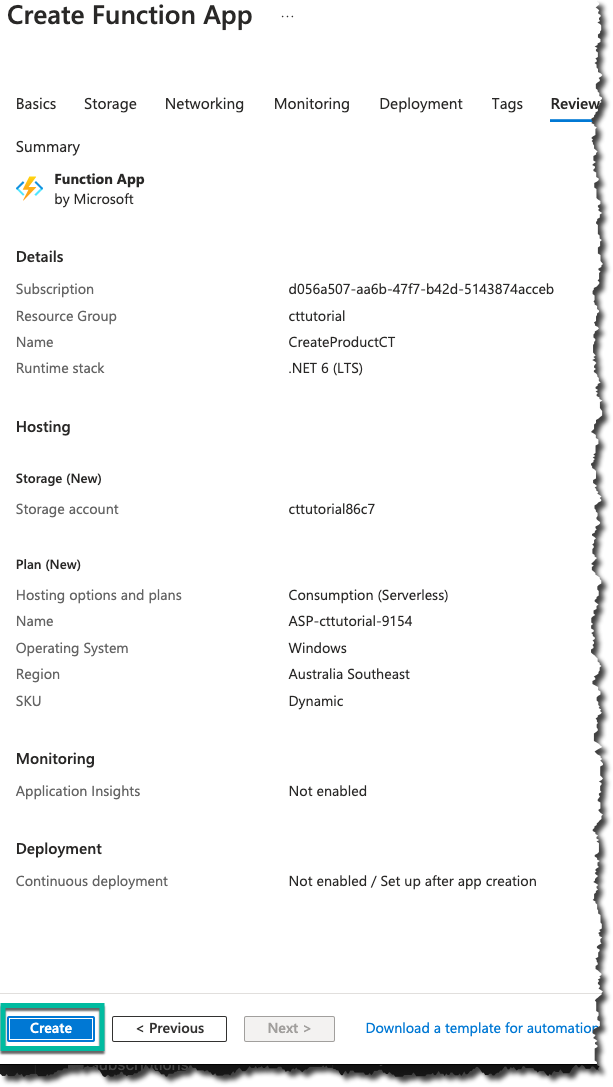
7: When the deployment is complete, click Go to resource to ensure the service is running:
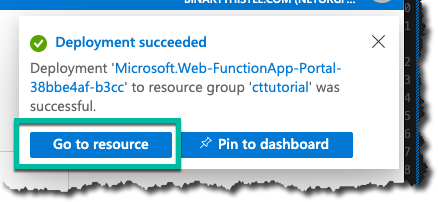
The resource should be in the running state:

Create an Azure Function Project in VS Code
8: Open a new session of VS Code, 1. select the Azure Logo, 2. click the Create Function.. button:
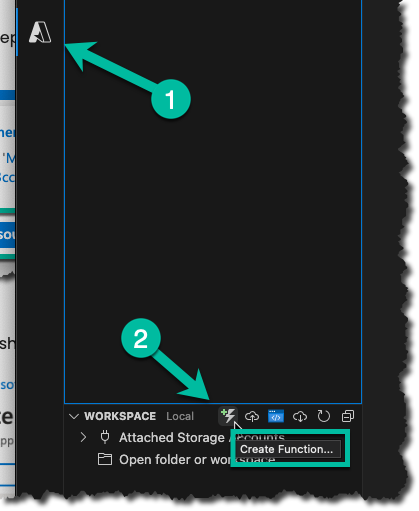
Navigate to a suitable project folder location for your function (you will need to create this manually if a suitable location does not exist), and select it.
9. Select C# as the language
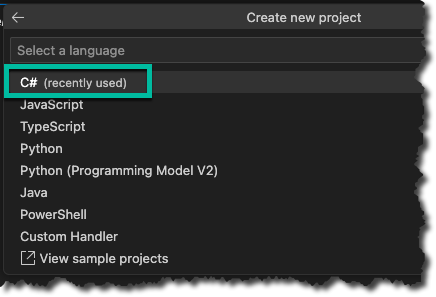
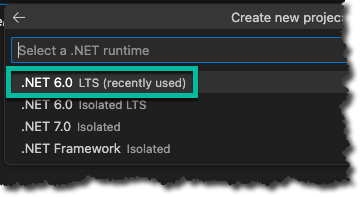
10. Select the .NET 6 Runtime
11. Select the HTTP Trigger
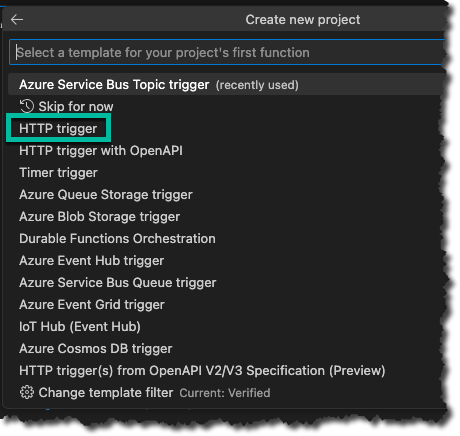
12: Keep the default name for the trigger function

13: Keep the default namespace

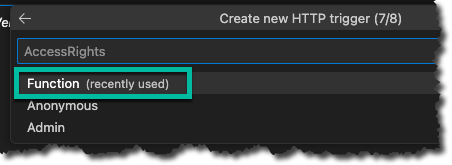
14: Select Function for access rights
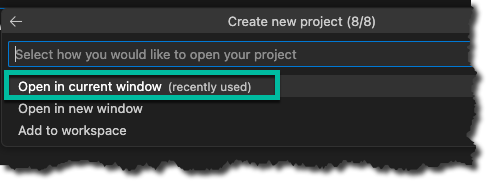
15: Open the project in the current window
Update local project settings
16: Open the local.settings.json file and add the following 4 configuration attributes to it:
ct_api_endpoint- The domain name of your commercetools API instancect_project_key- Your commercetools project keyct_bearer_token- The API Session token, we’ll obtain this in the next sectionct_product_type_id- The product type of the product we’ll create, we’ll obtain this in the next section
Your file should look something like this:
{
  "IsEncrypted": false,
  "Values": {
    "AzureWebJobsStorage": "",
    "FUNCTIONS_WORKER_RUNTIME": "dotnet",
    "ct_api_endpoint" : "https://<your region>.gcp.commercetools.com",
    "ct_project_key": "<Your Project Key>",
    "ct_bearer_token": "<To be supplied later>",
    "ct_product_type_id" : "<To be supplied later>"
  }
}
This file is used to store the local config elements that will allow us to make a call to the commercetools API, some points to note:
- The
local.settings.jsonfile is for local config only, and should not be exposed anywhere outside your local development environment, e.g. GitHub. If there isn’t already an entry for it in the project.gitignorefile then you should add one. - We will need to replicate these configuration elements in our Azure function
- In the interests of time we will not be implementing a full authentication flow, instead we’ll be generating the API session (aka Bearer) token manually.
Create a Data Transfer Object (DTO)
17: Create a new folder in the root of our project called Dtos and add a new file to this folder called CTProductCreateDto.cs, your project should look like this:
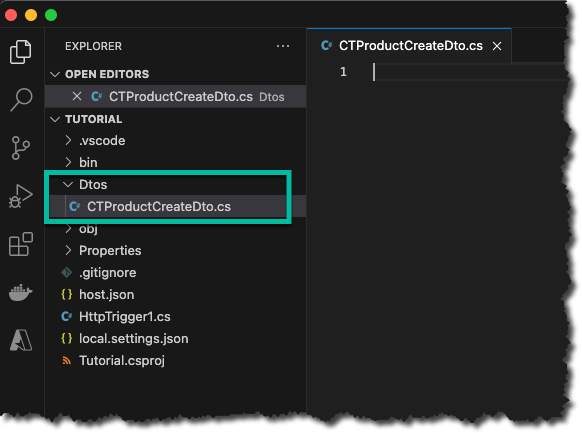
We’ll use a Data Transfer Object (DTO) object to construct the body payload sent to the commercetools Product Create API.
18: Add the following code to the CTProductCreateDto.cs file and save:
using Newtonsoft.Json;

namespace CreateProductCT.Dtos
{
    public partial class CTProductCreateDto
    {
        [JsonProperty("name")]
        public Name Name { get; set; }

        [JsonProperty("productType")]
        public ProductType ProductType { get; set; }

        [JsonProperty("slug")]
        public Name Slug { get; set; }
    }

    public partial class Name
    {
        [JsonProperty("en")]
        public string En { get; set; }
    }

    public partial class ProductType
    {
        [JsonProperty("id")]
        public string Id { get; set; }
    }
}
This is pretty much the minimal payload we can supply to the commercetools API that allows us to create a product, we cover this in more detail in the next section.
Add a Create Product Method
19: In the HttpTrigger1.cs file add a new method to the HttpTrigger1 class:
public static async Task<bool> CreateCommerceToolsProductAsync(CTProductCreateDto prod)
{
  var httpContent = new StringContent(
    JsonConvert.SerializeObject(prod),
    Encoding.UTF8,
    "appliction/json");

  HttpClient client = new HttpClient();

  client.DefaultRequestHeaders.Add("Authorization", $"Bearer {Environment.GetEnvironmentVariable("ct_bearer_token")}");

  var response = await client.PostAsync($"{Environment.GetEnvironmentVariable("ct_api_endpoint")}/{Environment.GetEnvironmentVariable("ct_project_key")}/products", httpContent);

  if(response.IsSuccessStatusCode)
    return true;

  return false;

}
You will also need to include the following namespaces at the top of the file:
using CreateProductCT.Dtos;using System.Net.Http;using System.Text;
The CreateCommerceToolsProductAsync method will accept a DTO and:
- Creates a
StringContentobject with a serialized instance of the DTO - Adds an Authorization header to the
HttpClientthat we have created- Noting that it reads the (as yet undefined) bearer token value from local config
- Makes a
POSTrequest to our API endpoint - Determines if the call was successful or not and passed back the result
Update the Run method
20: Remaining in HttpTrigger1 class update the Run method to reflect the following:
[FunctionName("HttpTrigger1")]
public static async Task<IActionResult> Run(
  [HttpTrigger(AuthorizationLevel.Function, "get", "post", Route = null)] HttpRequest req, ILogger log)

  //Start of New code
  {
    if(req.Headers["AuthKey"] != "marketplacerletmein")
      return new OkObjectResult("Good try...");
    log.LogInformation("C# HTTP trigger function processed a request.");

    var payload = JsonConvert.DeserializeObject<dynamic>(await new StreamReader(req.Body).ReadToEndAsync());

    Console.WriteLine($"---> Payload ID: {payload.id}");

    if (payload.event_name != "create")
    {
      return new OkObjectResult("Not a create event");
    }

    Console.WriteLine($"---> Product Title: {payload.payload.data.node.title}");

    var newProduct = new CTProductCreateDto{
      Name = new Name{ En = payload.payload.data.node.title},
      ProductType = new ProductType{Id = Environment.GetEnvironmentVariable("ct_product_type_id")},
      Slug = new Name{ En = payload.payload.data.node.legacyId}
    };

    //if(await CreateCommerceToolsProductAsync(newProduct))
    //    return new OkObjectResult("Product Created");

    //return new BadRequestObjectResult("Something went wrong...");

    return new OkResult();

    //End of new code
}
Points to note:
- We check for a header key of
AuthKeyand validate the value, make sure you update the value (and check the key name) to whatever you configured in your Marketplacer webhook header.- If authorization fails, then we still send a HTTP 200 result as we don’t want Marketplacer to resend the webhook. See note below for more detail on this point.
- We deserialize the body using the
NewtonsoftJson library, note we are making use ofdynamicwhich means that our deserialized object is not typed. - We check to see if this is a
createevent and return Http 200 if not as we don’t want Marketplacer to retry sending this webhook event. See note below for more detail on this point. - We construct a DTO based on the Webhook payload
- We’d usually make a call to
CreateCommerceToolsProductAsyncto attempt product creation in commercetools, this is commented out for now and we just return ok.
Webhook Retries
If Marketplacer receives a non HTTP 200 response from a webhook POST request then it will attempt to retry the webhook. In scenarios where retrying would be pointless (e.g. it is the wrong type of event) then we shouldn’t reply with a non HTTP 200 response.Run a local instance of the function
21: In VS Code with our function project open press F5 to run up a local instance of our function, give it a minute or two and you should see something similar to the following:

We now have a local endpoint that we can test with.
Test local endpoint
22: Using an API client of your choice (Insomnia, Postman, cURL etc.) we can simulate a Webhook call directly to this local endpoint, you will need to make a POST request and attach a body and headers as follows:
Body
{
  "id": "V2ViaG9va0V2ZW50LTI=",
  "event_name": "create",
  "payload": {
    "data": {
      "node": {
        "id": "QWR2ZXJ0LTEwMDAwMjU5OA==",
        "title": "Platinum T-Shirt",
        "legacyId": 100002598,
        "variants": {
          "nodes": [
            {
              "id": "VmFyaWFudC0zNjU3",
              "sku": "cp4u-0001",
              "countOnHand": 1000
            }
          ]
        },
        "__typename": "Advert",
        "description": "This is a great T-Shirt"
      }
    }
  }
}
Header
Content-Type:application\jsonAuthKey:your token
An example call using cURL is shown below:
curl -XPOST
-H 'AuthKey: <your token>'
-H "Content-type: application/json"
-d '{"id":"V2ViaG9va0V2ZW50LTI5","event_name":"create","payload":{"data":{"node":{"id":"QWR2ZXJ0LTEwMDAwMjU5NA==","title":"Platinum T-Shirt","legacyId":100002599,"variants":{"nodes":[{"id":"VmFyaWFudC0zNjQ4","sku":"cp4u-0001","countOnHand":1000}]},"__typename":"Advert","description":"This is a great phone"}}}}' 'http://localhost:7071/api/HttpTrigger1'
Having made a direct call, we should see output similar to the following:

When you’ve finished testing, press Shift + F5 to disconnect the local running instance.
Deploy function code to Azure
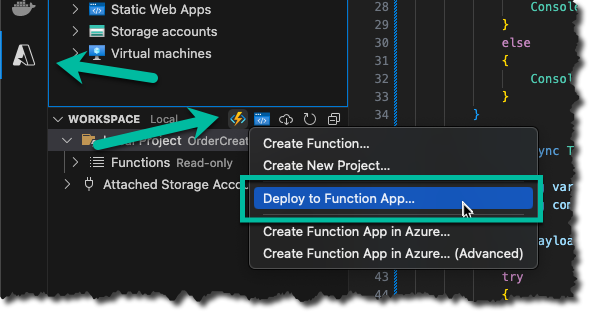
23: Back in VS Code, select the Azure icon, then Select Deploy to function app…:
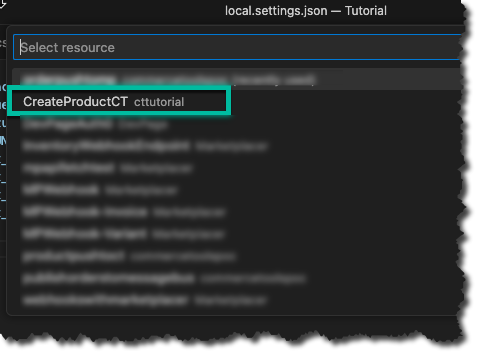
24: Select the Azure Function name that we created:
Follow the remaining on-screen prompts to complete the deploy
25: When the deployment completes you should see the following message, click on Upload settings to push our local config up to Azure:

26: Back over in our Azure function, click Configuration and ensure that the highlighted configuration elements have been pushed to Azure:
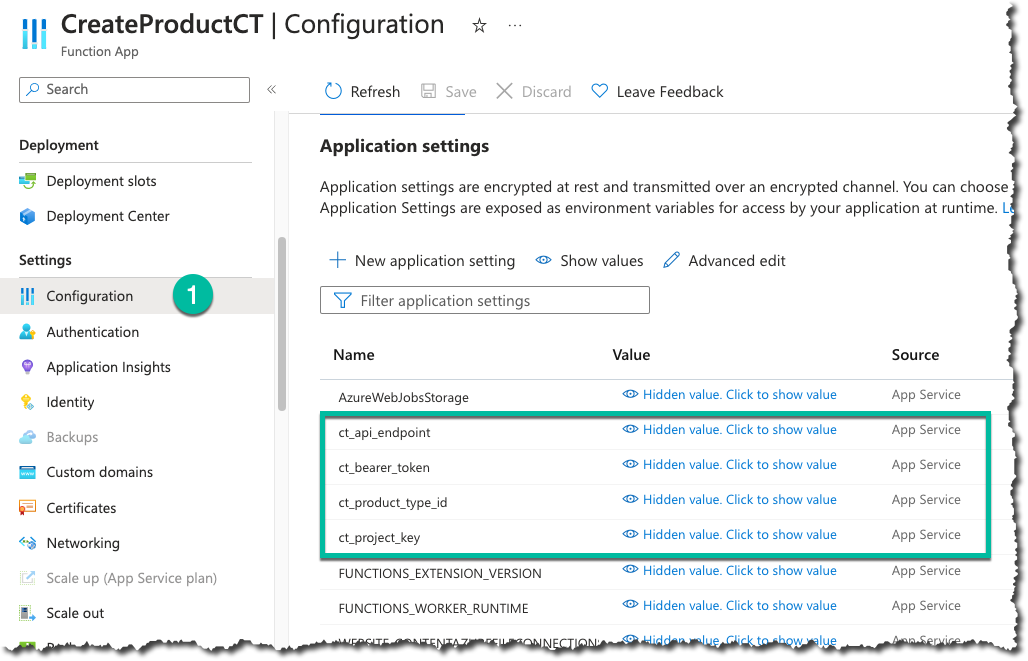
Although not necessary, you can check the values that have been populated by clicking on the appropriate value.
Next Up: commercetools API