6. Service Bus Azure Function
11 minute read
Build Outcome
By the end of this section we will have:
- Created an Azure Service Bus Trigger Function
- Tested the function locally to ensure it triggers
- Deployed the function to Azure
Steps
Companion Video
The companion video for this section can be found here.Create an Azure Service Bus Trigger Function
Login to the Azure portal and:
1: Select Create a resource
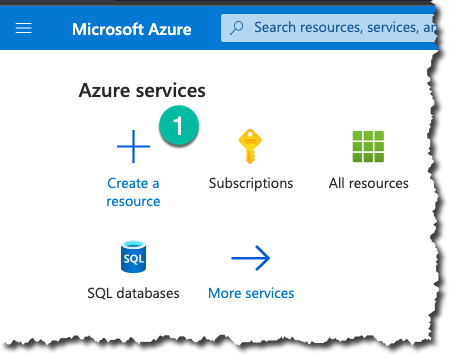
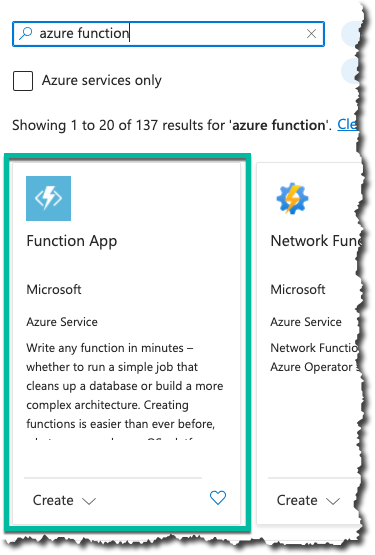
2: Search for “Azure Function” and select the Function App by Microsoft:
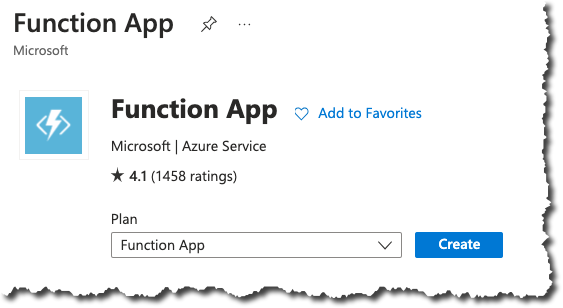
3: Click Create:
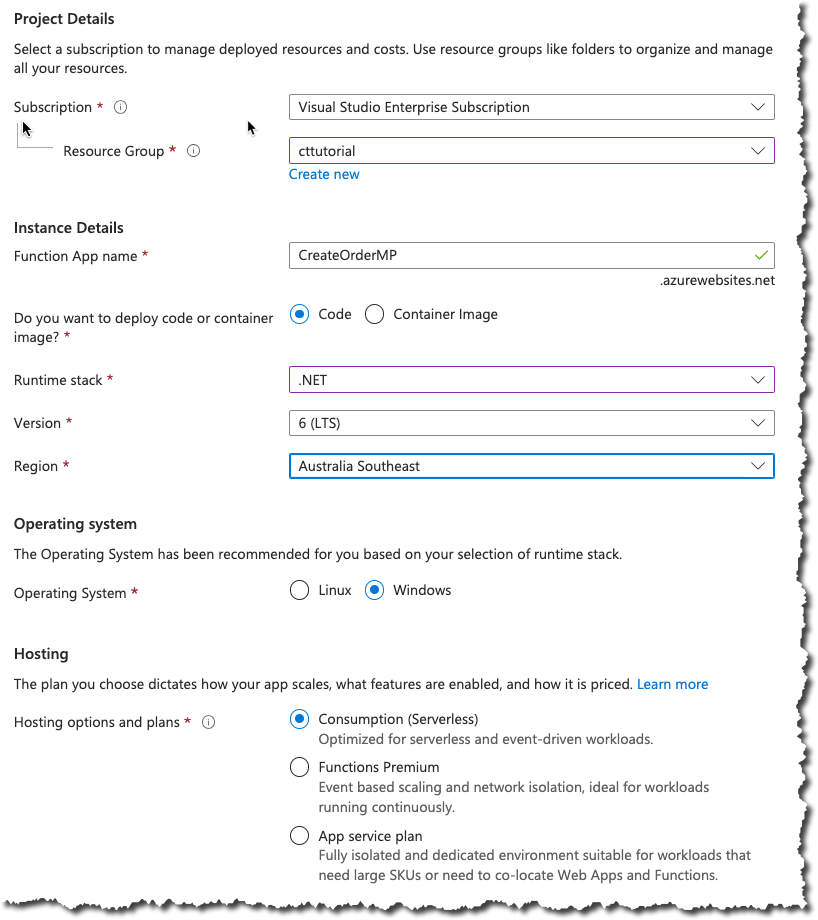
4. Complete the fields in the Create Function App form, ensuring that you select your own suitable values for the following fields:
- Resource Group
- Function App Name
- Region
5: You can choose to move through the rest of the function set up or select Review + create as the default values are sufficient for this tutorial.

6: When you’re happy with the configuration, click create and Azure will start to provision the service.
Warning
You are provisioning a service that may incur charges borne by the Azure account holder. If in doubt, refer to the Azure Pricing Calculator for more info..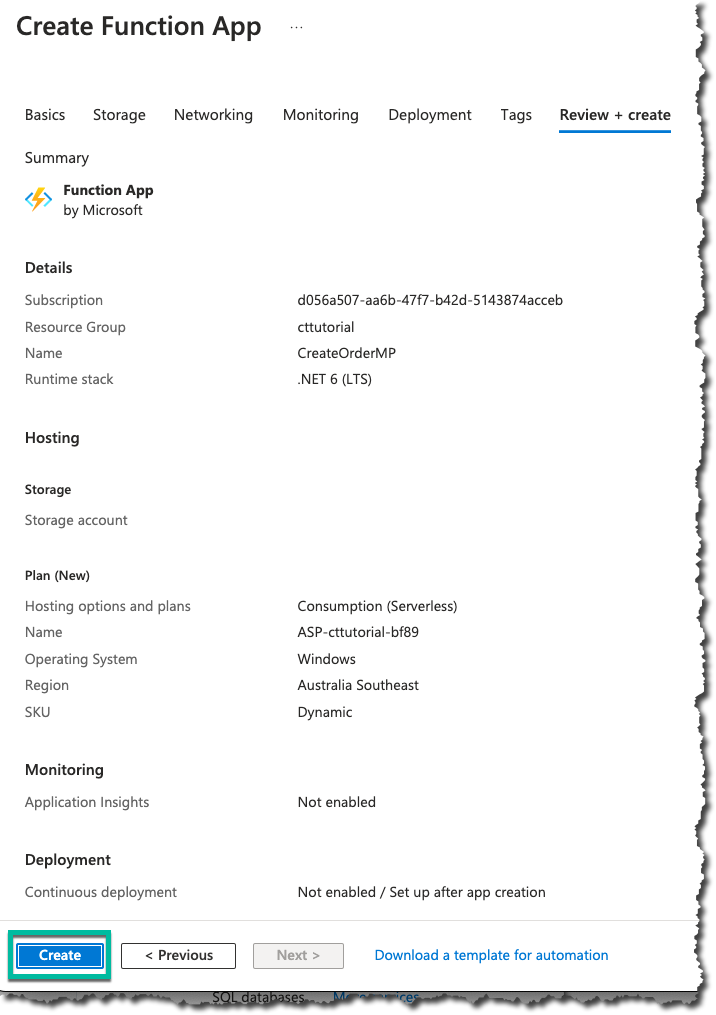
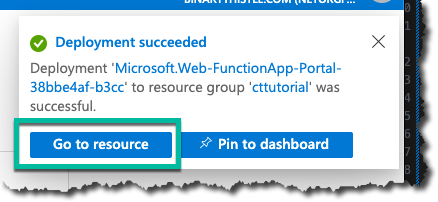
7: When the deployment is complete, click Go to resource to ensure the service is running:
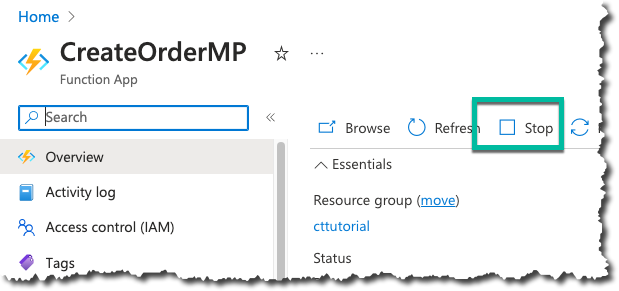
The resource should be in the running state:
Create an Azure Function Project in VS Code
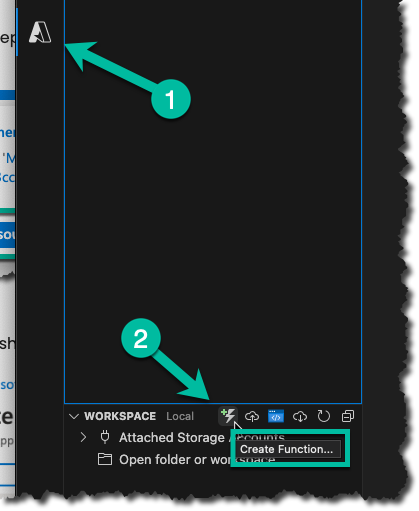
8: Open a new session of VS Code, 1. select the Azure Logo, 2. click the Create Function.. button:
Navigate to a suitable project folder location for your function (you will need to create this manually if a suitable location does not exist), and select it.
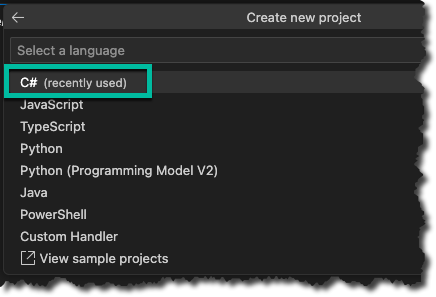
9. Select C# as the language
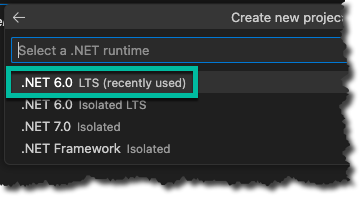
10. Select the .NET 6 Runtime
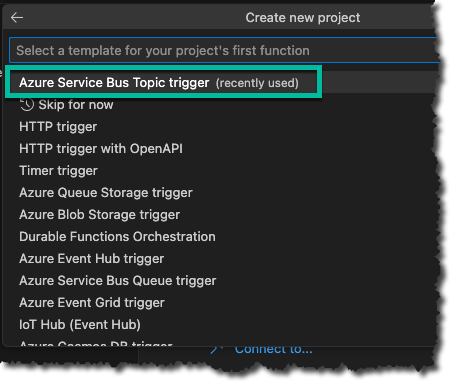
11. Select the Azure Service Bus Topic Trigger
12: Keep the default name for the trigger function

13 Keep the default namespace

14: Keep the default settings location

15: Select the correct service bus namespace

16: Enter the name of the topic, in this case it should be orders

17: Enter the name of the subscription, in this case is should be S1

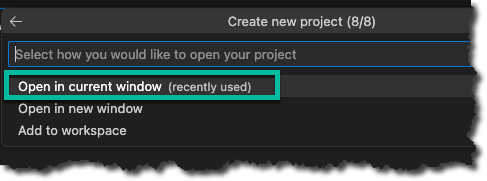
18: Open the project in the current window
Update local project settings
19: Open the local.settings.json file and add the following configuration attributes to it:
MPOperatorAPIKey- The API Key of the Marketplacer Operator APIMPOperatorAPIEndPoint- The endpoint of the Graphql based Operator API- Ensure that you include the
/graphqlroute
- Ensure that you include the
MPBasicAuth- [Optional] Only add this if you are using a Marketplacer instance that requires additional Basic Authentication. Refer to the instructions below on how to calculate this value. Otherwise you can ignore this.
Calculating the value of a Basic Auth Header
If your basic auth username was Admin and your password was abc123 then you calculate the value of a basic auth header in the following way:
- Form a single string with your username, a colon “:” and the password, e.g.
Admin:abc123(no spaces in between) - Base 64 encode that string, e.g.
QWRtaW46YWJjMTIz - Form the value of the Auth header by specifying the auth-type (in this case
Basic) and your Base 64 encoded username and password, e.g.Basic QWRtaW46YWJjMTIz(ensure there is a space betweenBasicand the encoded username and password)
So in this example that value you’d populate for MPBasicAuth would be: Basic QWRtaW46YWJjMTIz
Note: there are plenty of online tools that can do both Base 64 encoding as well as full Basic Auth header generation. Use your favorite search engine or generative AI for more detail.
Your file should look something like this (sensitive values have been redacted):
{
  "IsEncrypted": false,
  "Values": {
    "AzureWebJobsStorage": "",
    "FUNCTIONS_WORKER_RUNTIME": "dotnet",
    "ctneworderbus_SERVICEBUS": "Endpoint=sb://<your service buss connection string>",
    "MPBasicAuth": "Basic QWRtaW46YWJjMTIz",
    "MPOperatorAPIKey": "<your operator API key>",
    "MPOperatorAPIEndPoint": "https://<your Marketplacer instance>.marketplacer.com/graphql"
  }
}
This file is used to store the local config elements that will allow us to make a call to the Marketplacer Operator API, some points to note:
- The
local.settings.jsonfile is for local config only, and should not be exposed anywhere outside your local development environment, e.g. GitHub. If there isn’t already an entry for it in the project.gitignorefile then you should add one. - We will need to replicate these configuration elements in our Azure function, we’ll do this later.
Create an Order Create Method
We want to create a method in our function that will accept the payload of the commercetools subscription, deserialize it, and then create an order in Marketplacer. The payload of the commercetools order created message is rather long so rather listing it in its entirety, we’ve outlined the components that we will be interested in below:
order.lineItems[0].variant.keyorder.id
Some points to note:
- The only elements of the commercetools order that we’ll cascade through when creating an order in Marketplacer are those listed above (the variant
key= which will contain the Marketplacer VariantId, and the commercetools orderidthat we’ll add as an external id). Items such as customer name, address etc. will not cascade and will be hard coded - this is purely to keep our solution example simple. - We will only place an order for the first line item in the order, again for simplicity.
- We will populate a suitable Marketplacer variant id into an existing fully defined commercetools product in a later section.
To create our order create method:
20: In the ServiceBusTopicTrigger.cs file add a new method to the ServiceBusTopicTrigger1 class:
public async Task<bool> CreateMarketplacerOrderAsync(string body)
{
  string variantId = string.Empty;
  string commercetoolsOrderId = string.Empty;

  var payload = JsonConvert.DeserializeObject<dynamic>(body);

  try
  {
    variantId = payload!.order.lineItems[0].variant.key;
    commercetoolsOrderId = payload!.order.id;
    Console.WriteLine($"---> The variant id is: {variantId}");
    Console.ForegroundColor = ConsoleColor.Yellow;
    Console.WriteLine($"---> The Commercetools order id is: {commercetoolsOrderId}");
    Console.ResetColor();
  }
  catch(Exception ex)
  {
    Console.WriteLine($"---> Exception: {ex.Message}");
    return false;
  }

  if (variantId == string.Empty || commercetoolsOrderId == string.Empty)
    return false;

  var mpMutationObject = new
  {
    query = "mutation{orderCreate(input:{order:{firstName:\"Jane\" surname:\"Doe\" phone:\"0405555555\" emailAddress:\"jane.doe@email.com\" address:{address:\"146 Buckhurst Street\" city:\"Melbourne\" country:{code:\"AU\"}postcode:\"3000\" state:{name:\"Victoria\"}}externalIds:[{key:\"Commercetools_Order_Id\" value:\"" + commercetoolsOrderId + "\"}]}lineItems:[{variantId:\"" + variantId + "\",quantity:1,cost:{amount:999}}]}){order{id legacyId totalCents invoices{nodes{id legacyId}}}errors{field messages}}}",
    variables = new { }
  };

  var httpContent = new StringContent(
    JsonConvert.SerializeObject(mpMutationObject),
    Encoding.UTF8,
    "application/json");

  HttpClient client = new HttpClient();

  //This header is optional if you are not using basic authentication
  client.DefaultRequestHeaders.Add("Authorization", Environment.GetEnvironmentVariable("MPBasicAuth"));

  client.DefaultRequestHeaders.Add("marketplacer-api-key", Environment.GetEnvironmentVariable("MPOperatorAPIKey"));

  var response = await client.PostAsync(Environment.GetEnvironmentVariable("MPOperatorAPIEndPoint"), httpContent);

  if (response.IsSuccessStatusCode)
    {
      var content = await response.Content.ReadAsStringAsync();
      var contentObject = JsonConvert.DeserializeObject<dynamic>(content);
      Console.WriteLine($"---> Response Contents: {content}");
      if (contentObject!.data.orderCreate.order != null)
        {
          //Get the Marketplacer Order ID
          Console.WriteLine($"----> Marketplacer OrderId: {contentObject!.data.orderCreate.order.id}");
          return true;
        }
      else
        {
          Console.ForegroundColor = ConsoleColor.Red;
          Console.WriteLine($"----> Order Create Error: {contentObject!.data.orderCreate.errors}");
          Console.ResetColor();
          return false;
        }
      }
  return false;
}
You will also need to include the following namespaces at the top of the ServiceBusTopicTrigger.cs file:
using System.Threading.Tasks;using Newtonsoft.Json;using System.Net.Http;using System.Text;
The CreateMarketplacerOrderAsync method accepts the string that is received from the Azure Message Bus and:
- Deserializes the string
- Attempts to extract the
keyvalue for the first Line Items’ variant on the order - Attempts to extract the commercetools order
id - Will return
falseif either of those extracted values are null - Create
orderCreatemutation call- For a detailed dive into creating orders in Marketplacer, please refer to this article.
- Make request to the Marketplacer API
Update the Run method
21: Remaining in the ServiceBusTopicTrigger1 class update the Run method as follows
public async Task Run([ServiceBusTrigger("orders", "S1", Connection = "ctneworderbus_SERVICEBUS")]string mySbMsg)
{
  Console.WriteLine($"C# ServiceBus topic trigger function processed message: {mySbMsg}");

  if (await CreateMarketplacerOrderAsync(mySbMsg))
  {
    Console.WriteLine("---> Order created ok");
  }
  else
  {
    Console.WriteLine("---> Order not created");
  }
}
Make sure to change the method signature of
Runfrom returningvoidto returningasync Task. Also note we’re usingConsole.Writelineto print the message.
Run a local instance of the function
Casting your mind back to when we created a subscription in commerce tools, as part of the creation process commercetools places a test message onto the Azure Service Bus.
This is not a order created event, but it should still be enough for us to test whether the function will trigger, so we should see:
- The message payload printed to the console
- A binding exception will be thrown (and caught) - this is not a order payload
- The error message:
Order not created
To run up a local instance of our project, ensure all your changes are saved and:
22: In VS Code with our function project open press F5 to run up a local instance of our function, give it a minute or two and you should see something similar to the following:
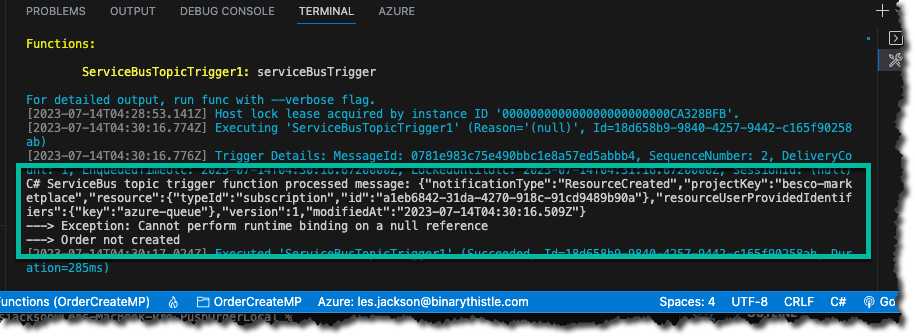
This of course has not created an order, but it does prove out that our function can read from the service bus.
Deploy function code to Azure
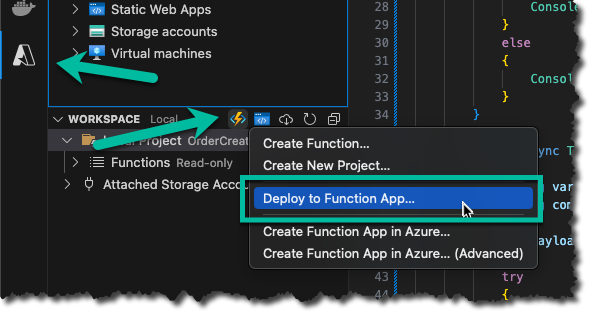
23: Back in VS Code, select the Azure icon, then select Deploy to function app…:
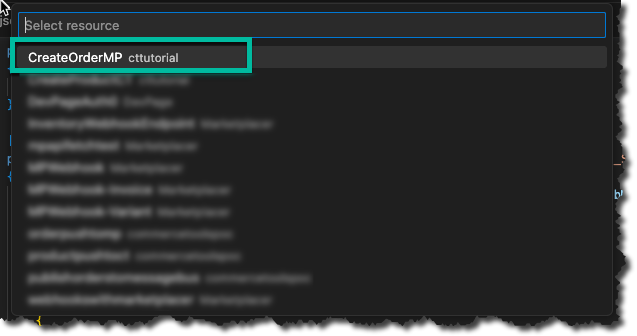
24: Select the Azure Function name for the order create function:
Follow the remaining on-screen prompts to complete the deployment.
25: When the deployment completes, you should see the following message, click on Upload settings to push our local config up to Azure:

26: Back over in our Azure function, click Configuration and ensure that the highlighted configuration elements have been pushed to Azure:
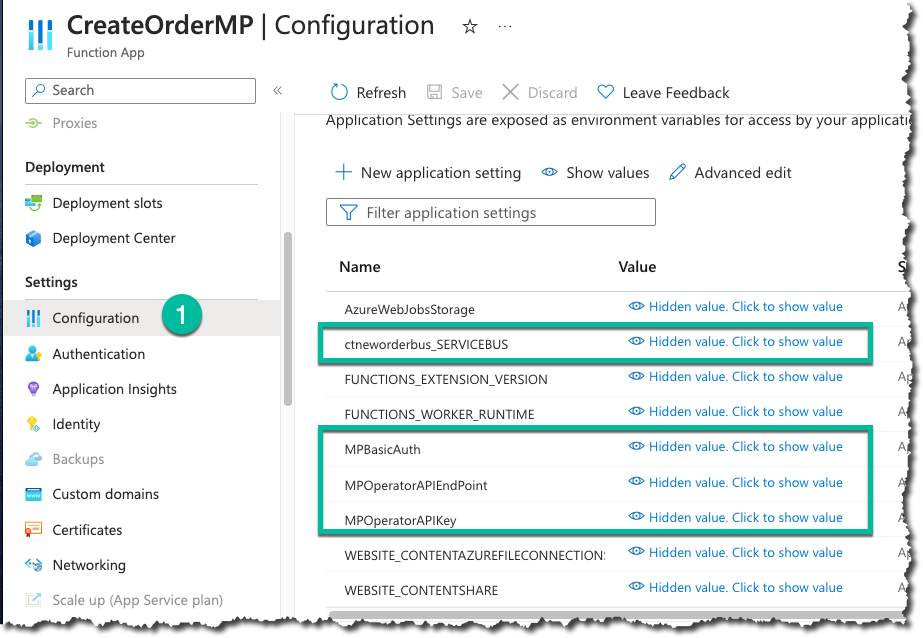
Although not necessary, you can check the values that have been populated by clicking on the appropriate value.
Update commercetools product
Before we can place an order in commercetools that will flow all the way through to Marketplacer, we want to attach a variant Id to one of the well-formed products in commercetools.
First up, let’s obtain a suitable Marketplacer Variant Id.
27: Using the API client of your choice (as mentioned at the start we’ll use Insomnia) run the following advertSearch query on your Marketplacer instance:
query {
	advertSearch {
		adverts {
			nodes {
				id
				title
				seller {
					businessName
				}
				variants {
					nodes {
						id
						label
						countOnHand
					}
				}
			}
		}
	}
}
Running this query will return purchasable products (adverts) along with their variants, a sample abbreviated (1 product) response is shown below:
{
  "data": {
    "advertSearch": {
      "adverts": {
        "nodes": [
          {
            "id": "QWR2ZXJ0LTEwMDAwMjU2Mw==",
            "title": "T-Shirt",
            "seller": {
              "businessName": "ACME Corp."
            },
            "variants": {
              "nodes": [
                {
                  "id": "VmFyaWFudC0zNjE2",
                  "label": "Red / L",
                  "countOnHand": 1000
                }
              ]
            }
          }
        ]
      }
    }
  }
}
We can see this product has 1 variant with a countOnHand position of 1000 units, we’ll pick this id (VmFyaWFudC0zNjE2) and use it in the next step.
Note: you will have to pick an appropriate variant id returned from your own query
Next up we want to update a published product in commercetools with this id, you could of course use the commercetools API to do this, we’re just going to use the commercetool Merchant Center.
28: Login to the commercetools Merchant Center, select Products, then Product list and identify a published that you want to work with:

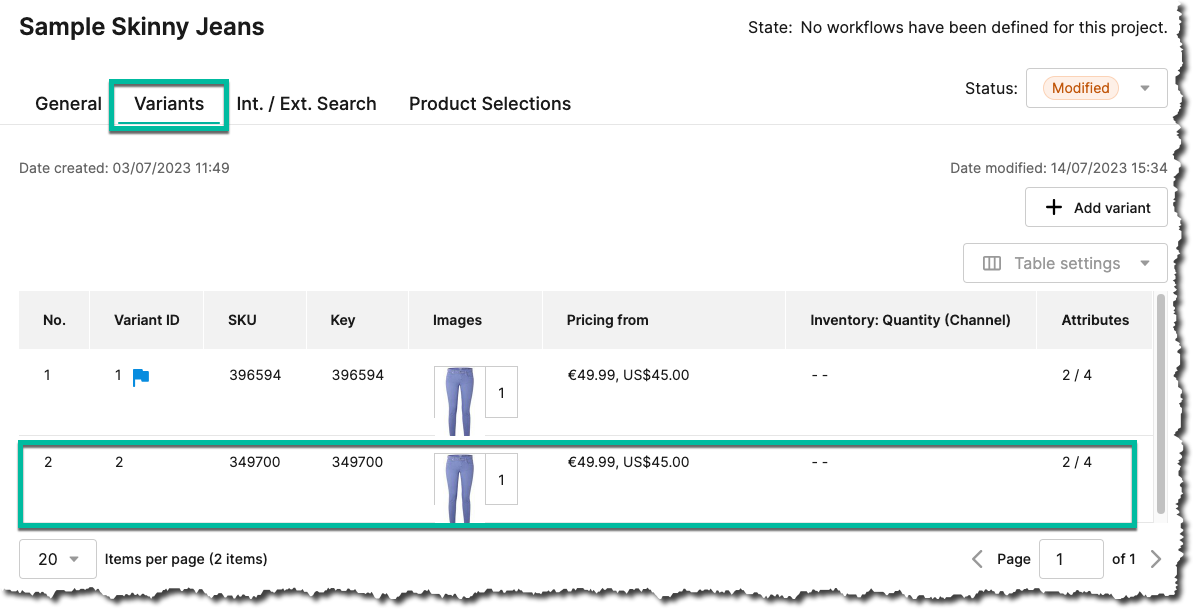
29: Select the variant tab, and pick a variant that you want to update:
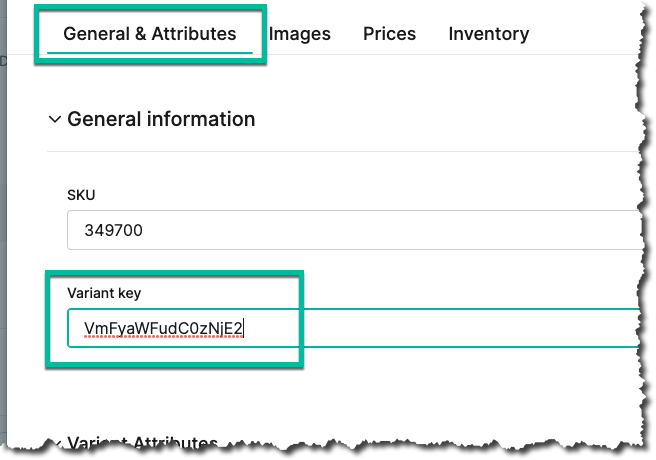
30: Select the General & Attributes tab, and update the Variant Key with the Marketplacer variant Id:
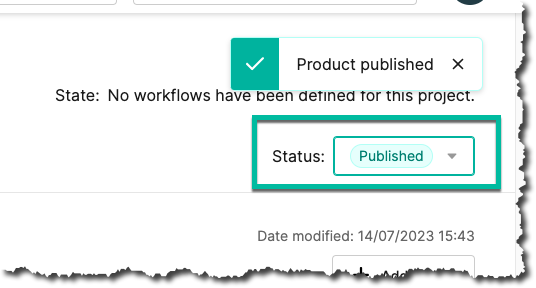
Save your changes to return to the Product Screen, you will see that the product is in the Modified state:

31: Select Published to place the product back into the Published state:
Create and Order
We are now going to simulate an order being placed in commercetools, to do so:
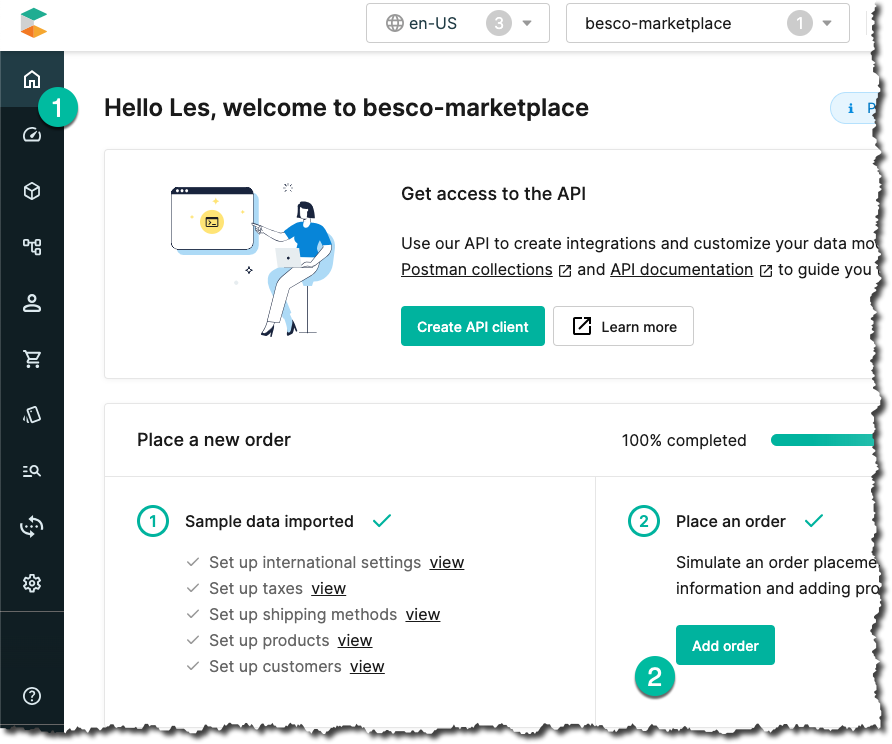
32: Remaining in the commercetools Merchant Center, select Home then Add order:
33: Move through the order create flow until you come to the Items section, populate the Item Search Box with the Marketplacer Variant Id and hit Enter:
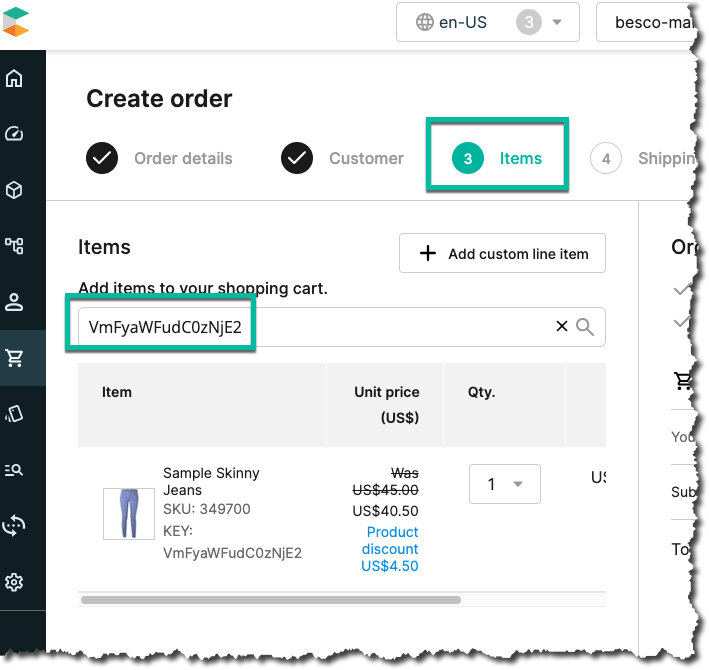
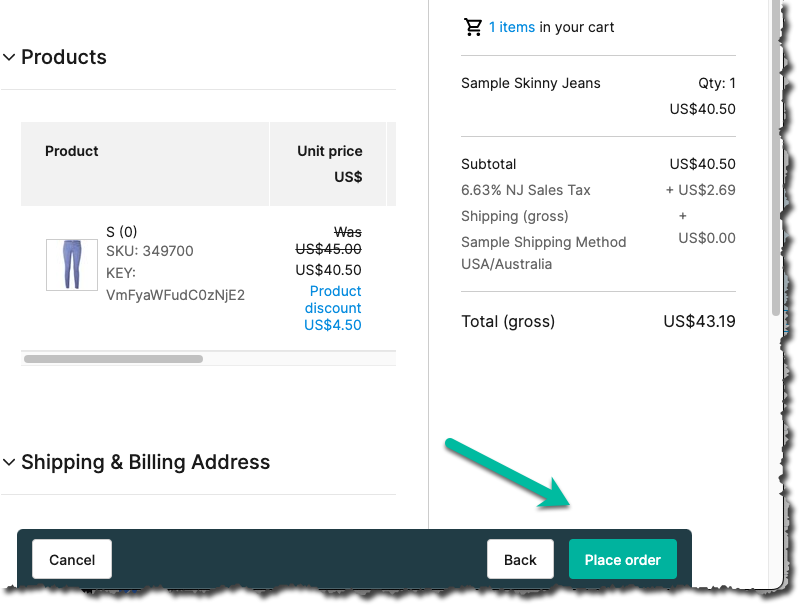
34: Move through the rest of the order create flow until you come to the Place order screen and place the order:
35: Moving back to the Marketplacer Operator Portal, select Orders then All sales and you will see an order has been placed for the variant with an id of VmFyaWFudC0zNjE2. Make a note of the Order # as we’ll be using that next (in this example it’s 10375).
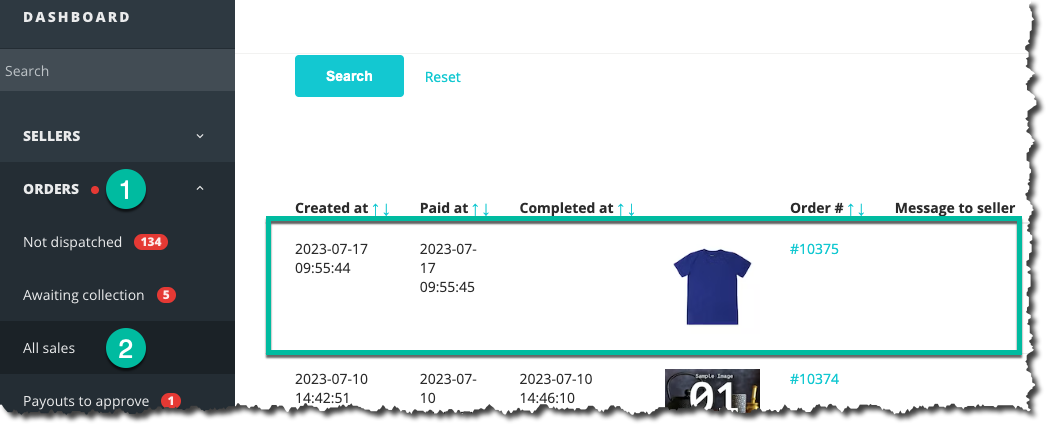
You’ll note that the product in commercetools and Marketplacer don’t actually match, that’s simply because we have assigned a “random” Marketplacer variant to a Product Variant in commercetools…
36: Move back to your favorite API client and run the following query, this just takes the orderId and return the ExternalIds for that order:
query {
	invoices(filters: { orderId: 10375 }) {
		nodes {
			order {
				externalIds {
					key
					value
				}
			}
		}
	}
}
In this case we can see that we have added the commercetools order Id as an externalId in Marketplacer.
{
	"data": {
		"invoices": {
			"nodes": [
				{
					"order": {
						"externalIds": [
							{
								"key": "Commercetools_Order_Id",
								"value": "7977951b-f351-47df-9377-07c6a1f5e5b7"
							}
						]
					}
				}
			]
		}
	}
}
37: You can then use the external id to search for the corresponding object in Marketplacer:
query {
	externalIds(
		ownerType: "order"
		key: "Commercetools_Order_Id"
		value: "7977951b-f351-47df-9377-07c6a1f5e5b7"
	) {
		owner {
			id
			__typename
			... on Order {
				id
				legacyId
				lineItems {
					nodes {
						variantId
					}
				}
			}
		}
	}
}
Final Thoughts
This was iteration #1 of this tutorial, the primary aim of which was to illustrate how both the Product and Order flows could work between Marketplacer and commercetools. Future iterations are likely to include the following elements:
- Session Management (for the commercetools
access_token) - Product Creation that results in a orderable product in commercetools
- Mapping of all the relevant commercetools order fields through onto the Marketplacer order object
- Product Updates
- Order Retries
- Line Item Dispatch